Navigating the Notebook
INSApplies to the
InSight ANM20Applies to the
Mars 2020 ANMERApplies to the
MER ANMSLApplies to the
MSL ANPHXApplies to the
PHX AN
Before we dive in to this help topic, please make note: the Analyst's Notebook for each mission is different from the others. Each Notebook is tailored to the mission, and information available from the archives and from science team results in a unique Notebook with specific features. You will find these help pages mostly applicable to recent Notebooks—those for MSL Curiosity, InSight, and MER Spirit and Opportunity. When you see a label like MSLApplies to the
MSL AN in the help, the text is relevant to the specific mission Notebook(s). We are working to unify the look and feel for all Notebooks and their help.
Notebook layout
The Analyst's Notebook screen is divided into two main parts: a main section panel on the left and a window workspace on the right. Also present are a banner at the top and window controls at the bottom.
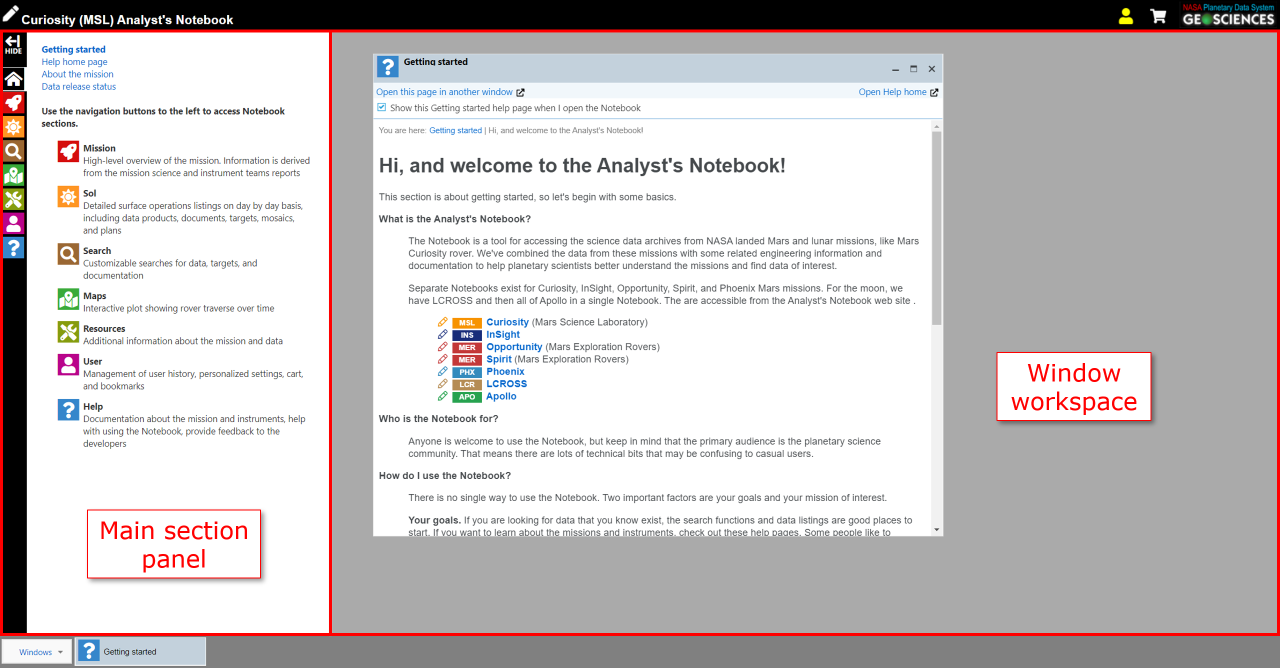
Main section panel
The Notebook is divided into themed sections, like mission information, search, and maps. The main section panel content changes as the section tabs are clicked. For example, when you click on the Search tab on the left edge of the Notebook, the main section panel contains search functions. You can hide the main section panel by clicking on the icon above the tabs. Click on the icon to show the main section panel again.
Window workspace
The right portion of the Notebook is a workspace where windows will appear containing details of selected data products, documents, targets, plans, and help topics. Windows can be moved, resized, and minimized as desired. When a window is opened, a small tab is added to the Windows controls at the bottom of the screen. Clicking on one of these tabs will reopen the window, if minimized, and bring it to the front of the workspace.
How do I get to the data?
You have some options here. You can browse through the mission data from the Sol summary tab. Click on to search the data by filters that you can set, such as time, location, and instrument. The rover traverse maps provide access to data based on location and sol.
When you select a data product, a detail window will appear in the workspace. From there you can find metadata labels, browse products, related data and targets, download links, and more. The content of the detail window depend on the mission and the type of data. Users who are new to PDS data should read more about data products to understand why the archive format may be different from the file formats you normally use, and also why that might be a good thing.
Where have I been?
The Notebook maintains a history list of the data, documents, targets, and searches you have opened. You can access your history by clicking on the User history tab. If you have chosen to create a Notebook account, we'll keep track of your history for you so it's available when you return. And, you can delete your history, if you wish.